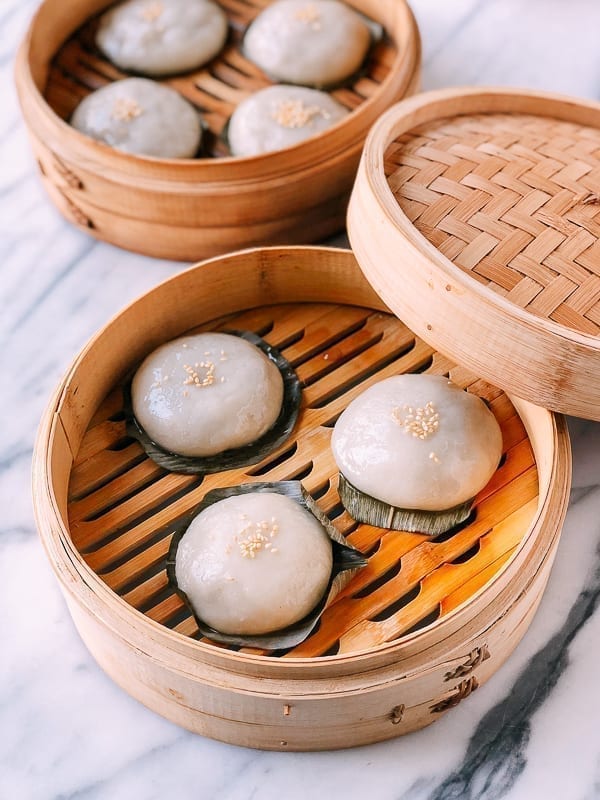
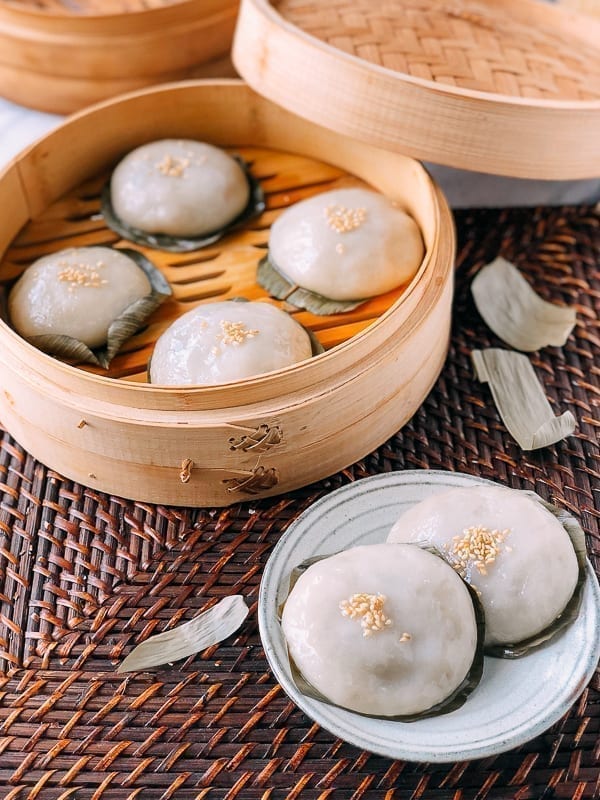
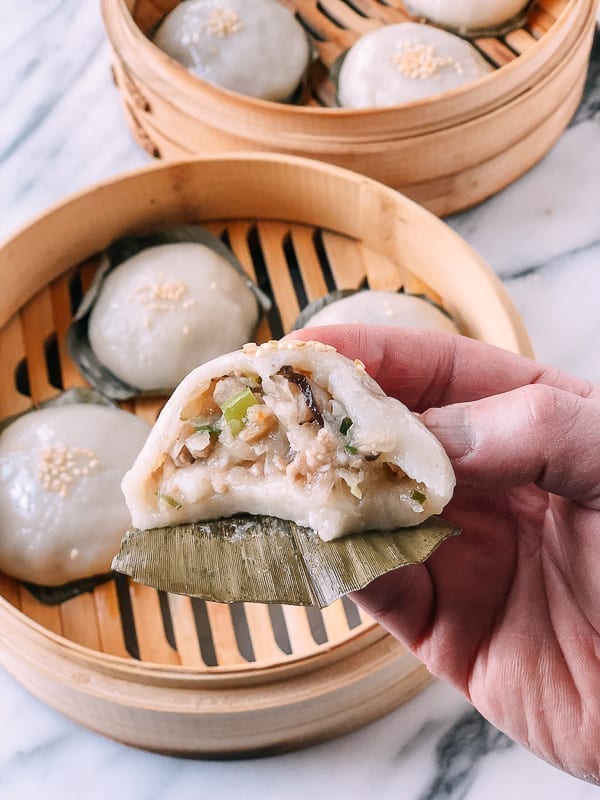
Cantonese Cha Guo (茶粿), or “tea cakes” are a delicious savory treat made with glutinous rice flour and stuffed with a savory pork filling of dried shiitake mushrooms, dried shrimp and daikon radish.
A New Year’s Tradition
Like our traditional Lo Bak Go recipe, these Cha Guo Glutinous Rice Cakes have a delicate flavor from daikon radish and are mostly consumed during Chinese New Year, also known as Spring Festival.
These savory cha guo rice cakes are more well known among Hakka Chinese people or kè jiā (客家) which literally means “guest families.”

Developing a Recipe from Childhood Memories
When I was young, every little Chinese kid (including me) who had one of these cha guo rice cakes in one hand and red envelopes in the other had that Winnie-the-Pooh-with-a-honey-pot sort of smile on their faces!
To me, eating cha guo evokes happy childhood memories of Chinese New Year, family dinners, and that annual windfall of red envelopes stuffed with lucky cash.
This cha guo recipe is also one of those Chinese New Year favorites that’s almost been forgotten and left in the minds of our family elders.
This recipe was a tricky one to pin down. It was particularly hard to perfect the texture and chewiness of the cha guo I remembered, along with writing out every measurement and detailed step. I cobbled the recipe together with some oversimplified verbal advice (“some of this and some of that”) from various elders in my family, what I could gather from my own childhood memories in the kitchen, and a lot of trial and error. After many, many attempts, I’ve found success in recreating that delicious memory I was so fond of years ago.
Luckily, the Lunar New Year was coming up, and these cha guo rice cakes freeze well, because I made quite a few batches of them to finalize this coveted recipe for everyone. We can now also officially chalk up another recipe to our archives in the name of preserving family food traditions!
Before we get into the cha guo recipe itself, I would suggest that you invest in a digital kitchen scale and use weight measurements for this recipe. Measuring cups and spoons are often inconsistent!
So let’s get the show on the road, and I’ll show you how to make these childhood favorites!
Cha Guo Recipe Instructions
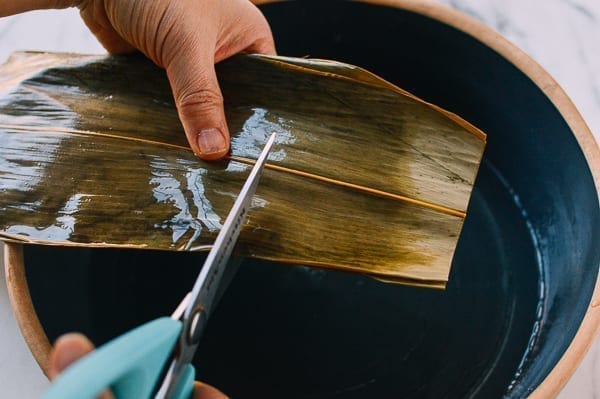
First, prepare the zong leaves by soaking them overnight.
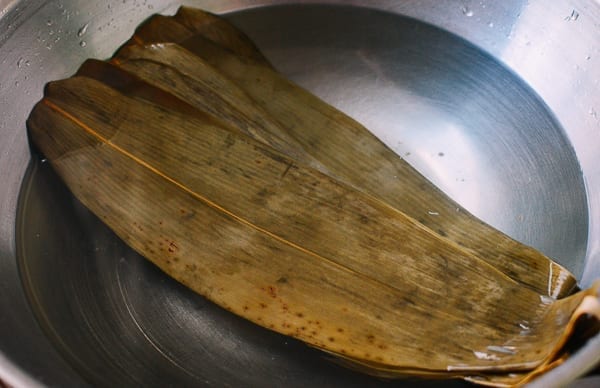
Rinse them and cut each of the six leaves into four 3- to 4-inch pieces. If you can’t find these bamboo leaves, then you can use parchment paper as a substitute.
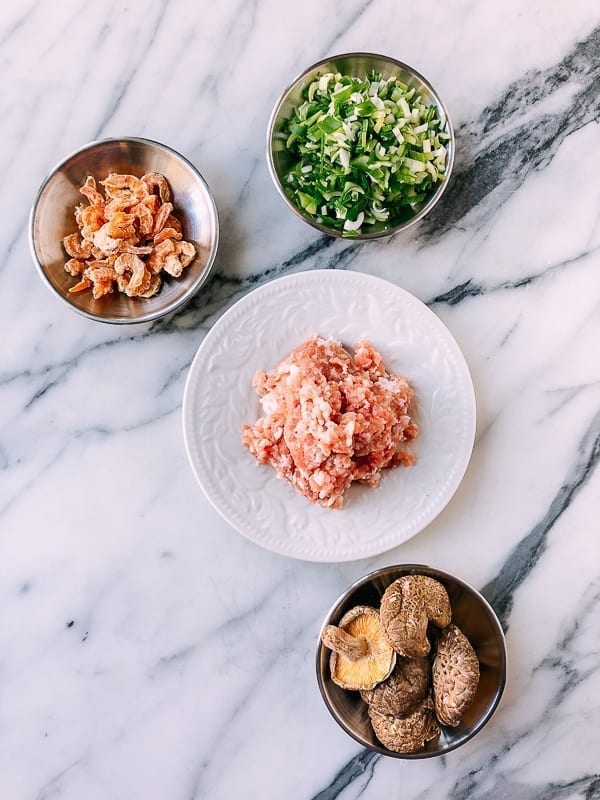
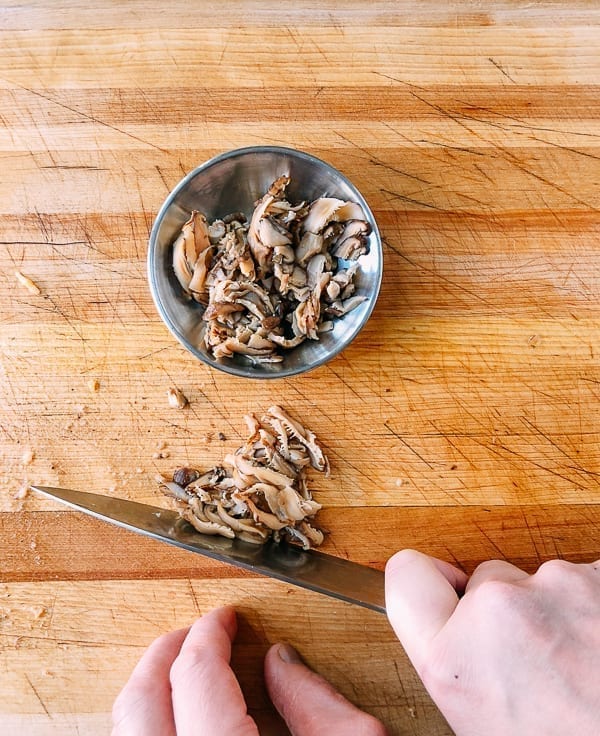
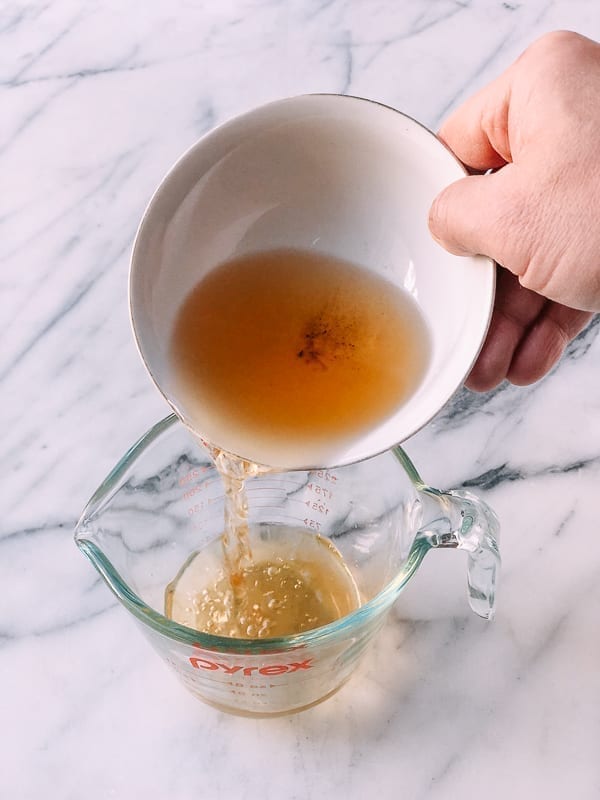
Soak your dried shiitake mushrooms in a bowl of hot water and place a small plate on top to ensure they are fully submerged for 30 minutes. Cut the stems off the mushrooms and discard them. Return the mushrooms to the water if they still seem dry inside, since thicker mushrooms will take longer to rehydrate. Finely chop the mushrooms and set aside, reserving the water you used to soak them.
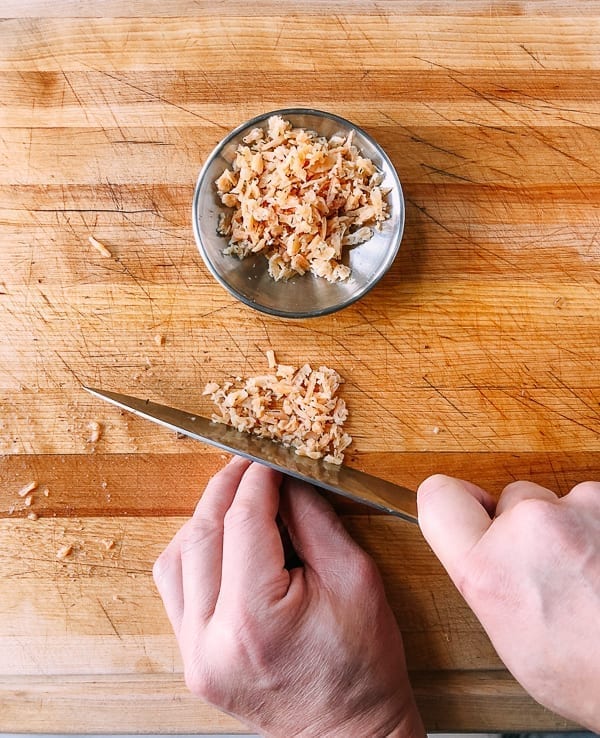
Soak your dried shrimp in hot water for 30 minutes. Pour the shrimp out into a strainer and give them a quick rinse before chopping them.
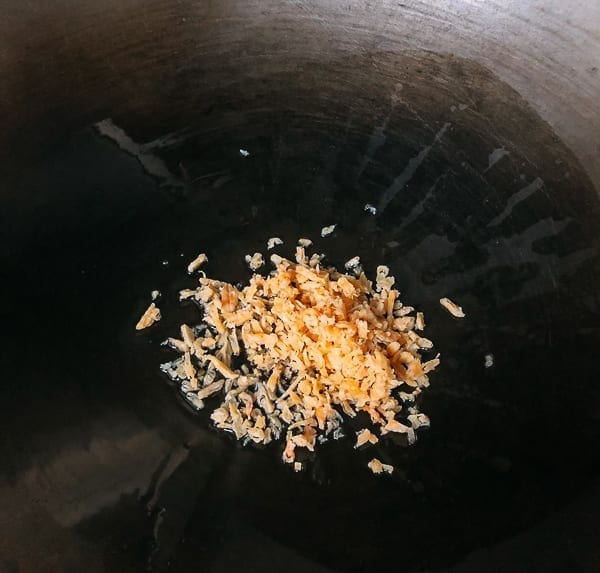
Heat 5 tablespoons (75 ml) vegetable oil in a frying pan or wok on medium low heat. Scoop out about 2 tablespoons of the heated oil and set aside for brushing the cha guo after they come out of the steamer.
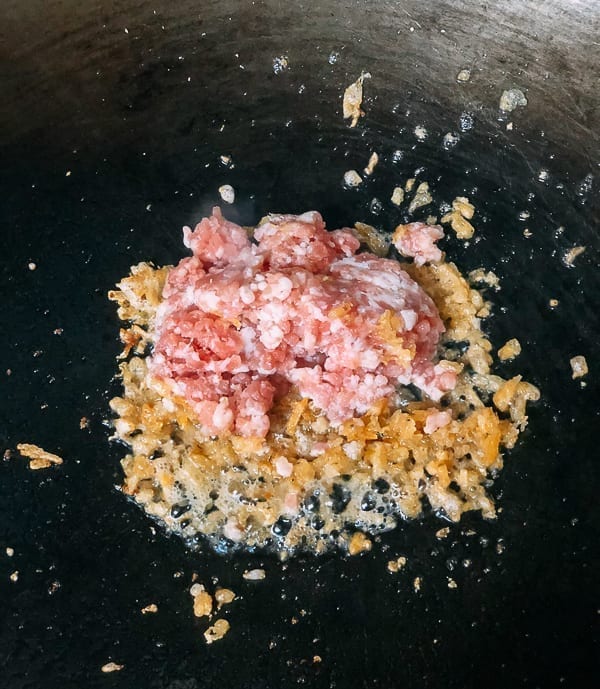
Add the dried shrimp to the oil and stir-fry until fragrant, about 30 seconds.
Next, add the ground pork and stir-fry for another 30 seconds, or until it is opaque.
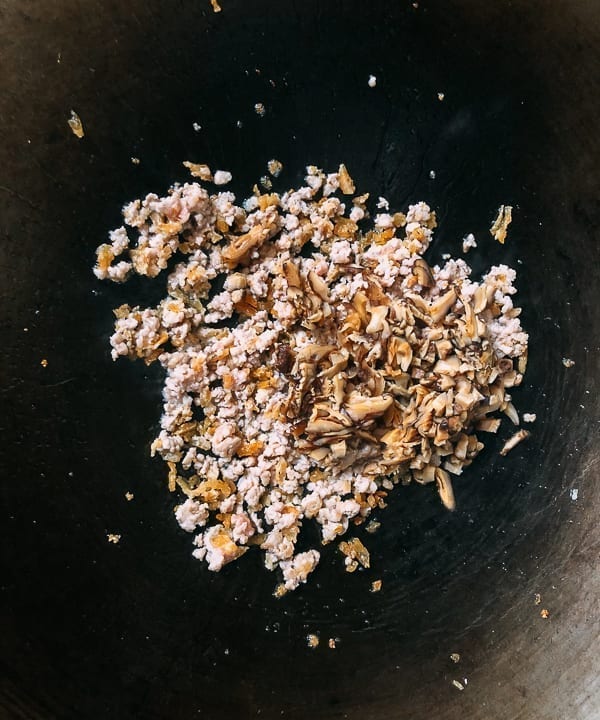
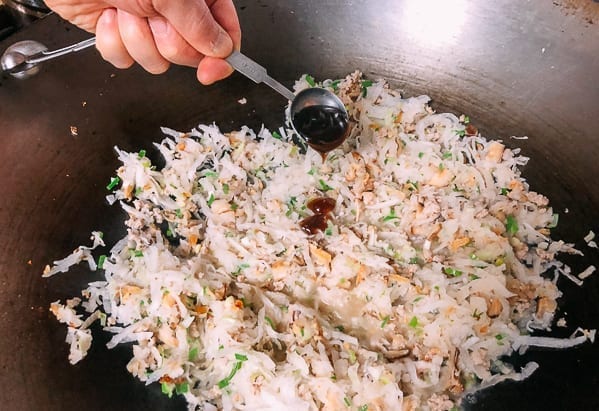
Stir in the chopped shiitake mushrooms and the Shaoxing wine.
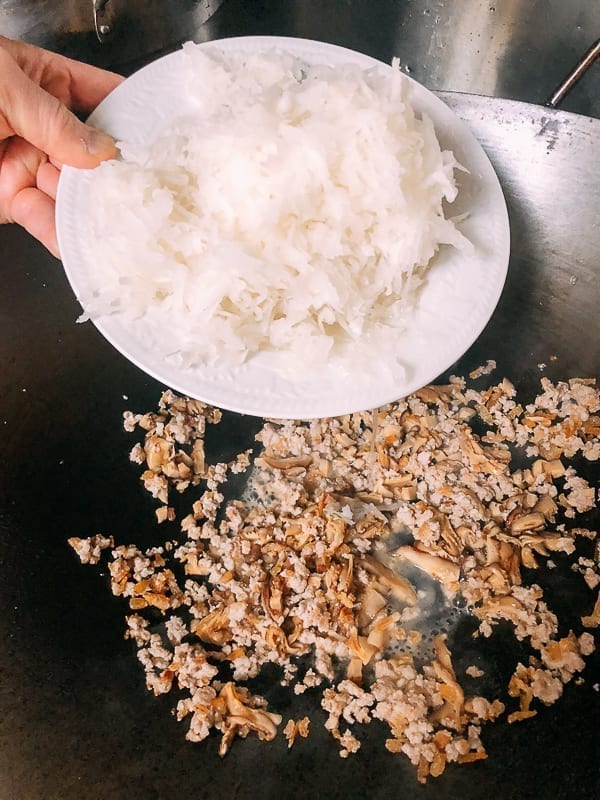
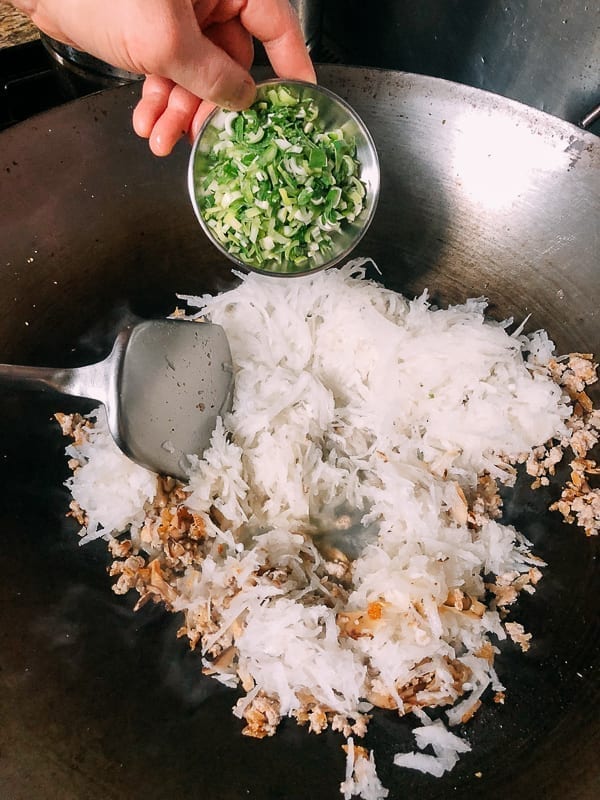
Next, add the grated daikon radish, chopped scallions, sesame oil, oyster sauce, 1 1/4 teaspoons salt, sugar, and white pepper. Cook on medium low heat until simmering and continue to simmer for another 3 to 4 minutes, or until the daikon radish is just tender.
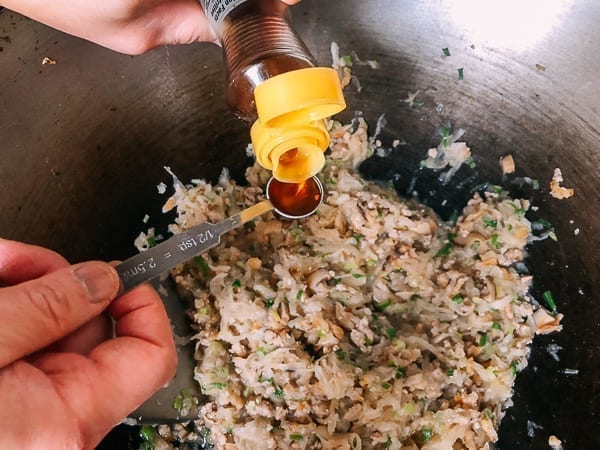
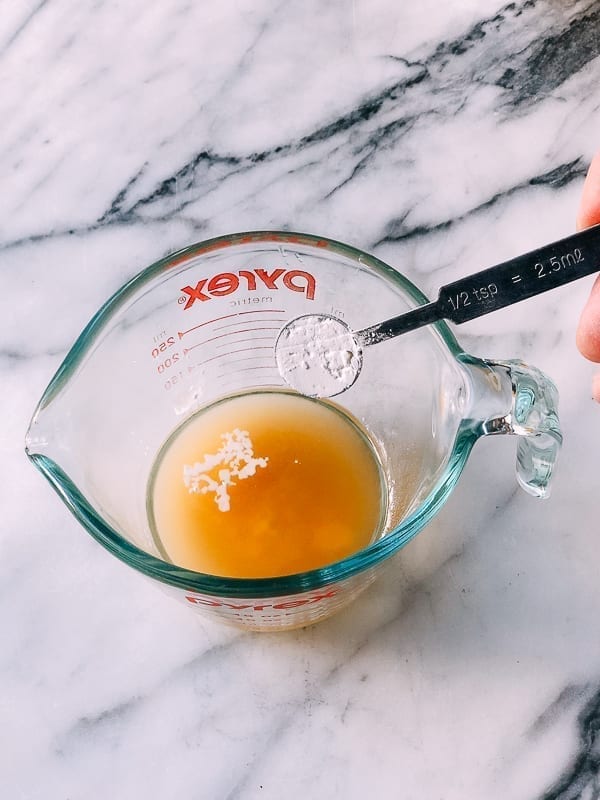
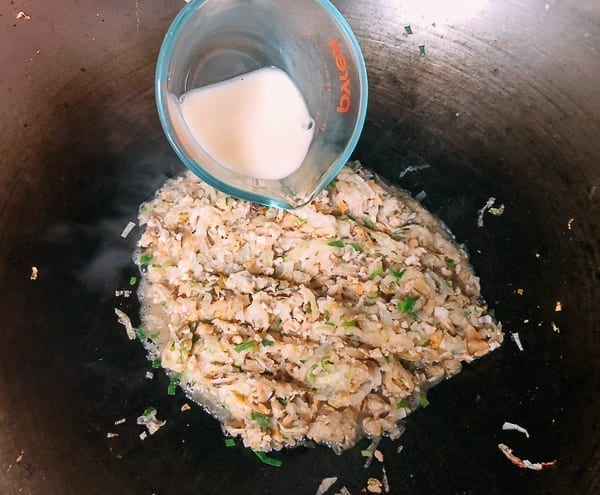
Combine 2 teaspoons cornstarch with 1/4 cup of the reserved mushroom soaking liquid, being careful to avoid any dirt or sediment that may have settled on the bottom of the bowl.
Add to the filling mixture in the wok.
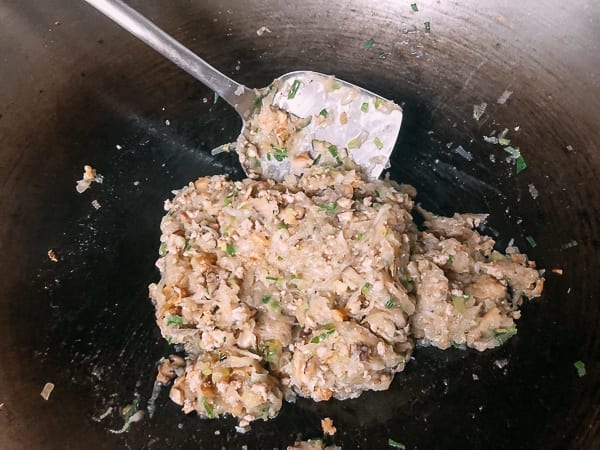
Continue to cook and stir until all standing liquid has evaporated, about 2 minutes. Set aside and let cool completely.
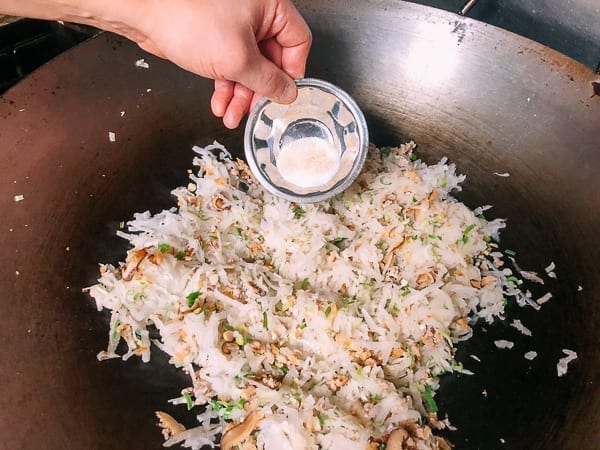
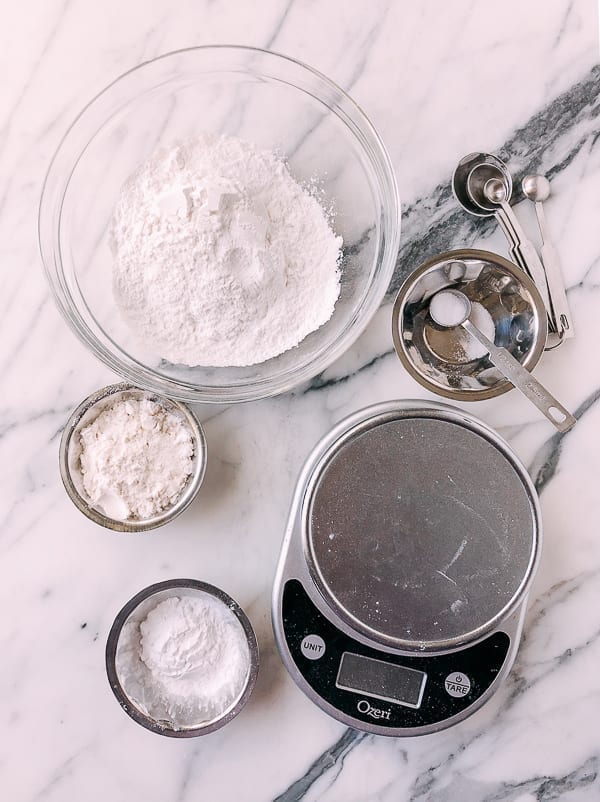
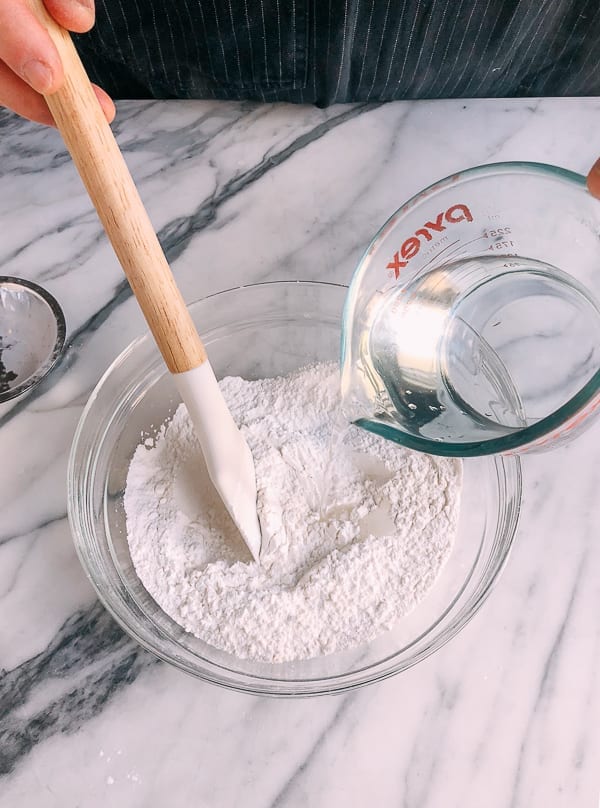
In a large mixing bowl, combine the glutinous rice flour, all purpose flour, tapioca starch, and the remaining 1 teaspoon salt.
Gradually stir 2 cups of boiling water into the dry mixture and continue mixing with a rubber spatula or wooden spoon until a dough begins to form.
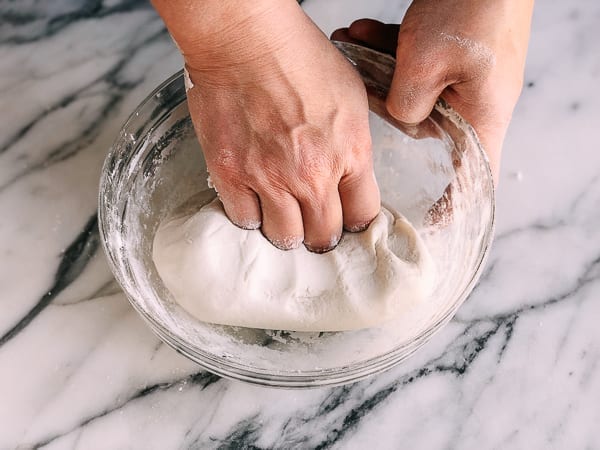
Once the mixture is cool enough to touch, knead the dough into a smooth ball. Add extra glutinous rice flour 1 tablespoon at a time if the dough is too sticky to knead. Once smooth, cover the dough in the bowl with an overturned plate, and let it rest for 20 minutes.
NOTE: Don’t be thrown off by the amount of dough in the photographs. I made half a batch of dough in these photos, because I decided to freeze the other half of the filling to save for Chinese New Year, when I’ll be making another half batch of fresh dough!
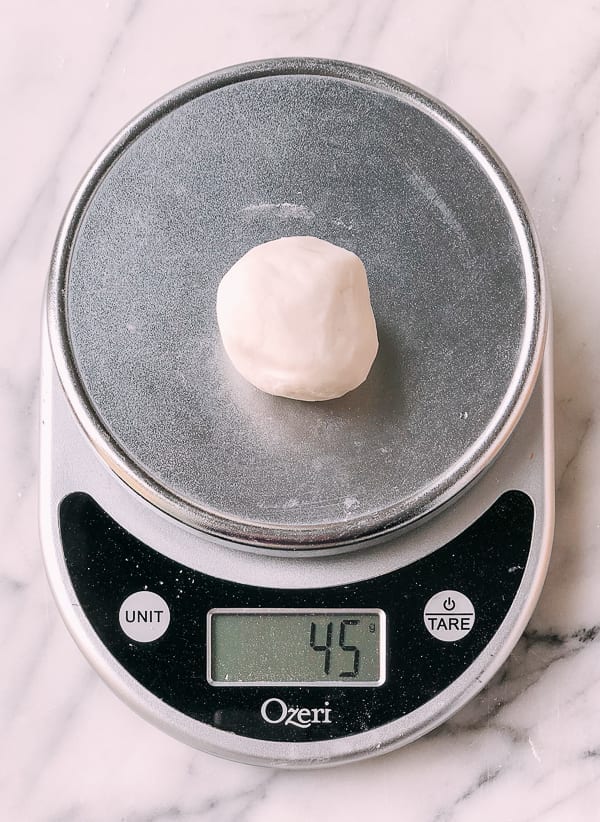
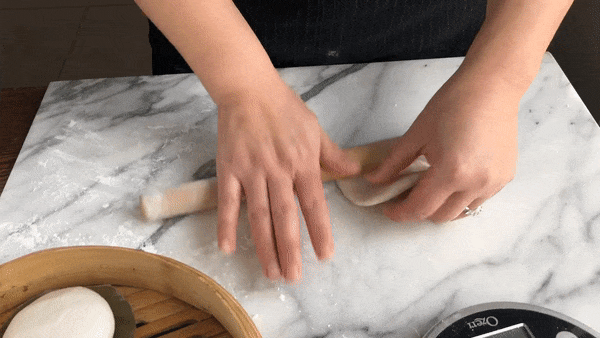
Divide the dough into 24 equal pieces about 45 g each, and keep them covered with a clean, damp kitchen towel to keep them from drying out while assembling the cha guo. I recommend using a digital scale to keep the cha guo rice cakes uniform in size.
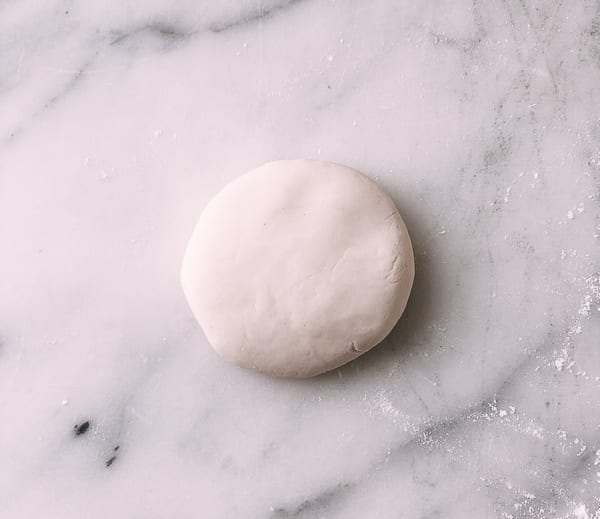
Press each small ball of dough to form a flat disc.
Use a rolling pin to roll out the edges of the disc until it is about 3 ½ to 4 inches in diameter.
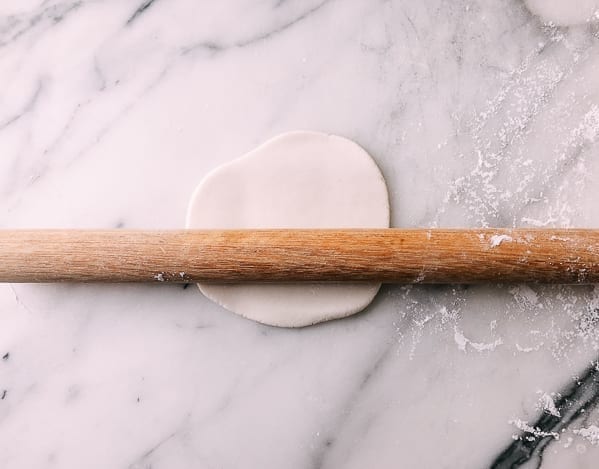
It’s important to make the edges of the disc slightly thinner than the middle, or you will have too much dough on one side after you pinch and close the edges.
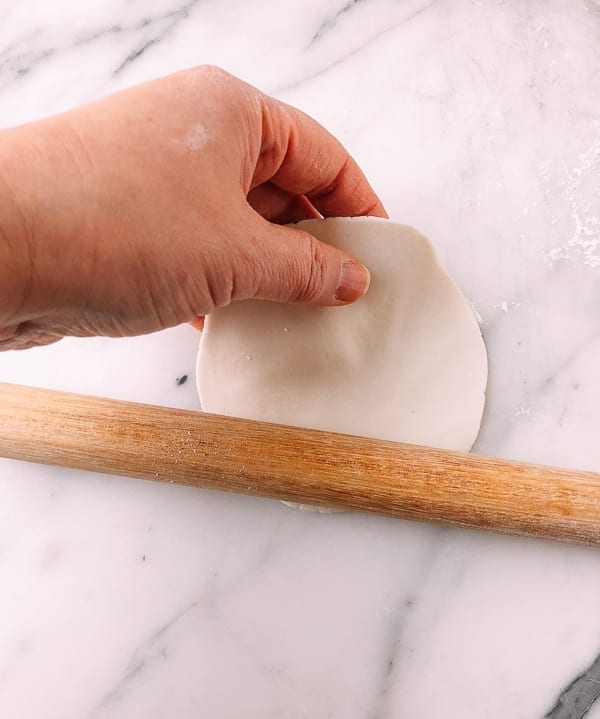
Here you can see the technique in action, of spinning the dough circle so that you can concentrate mostly on the outer edges:
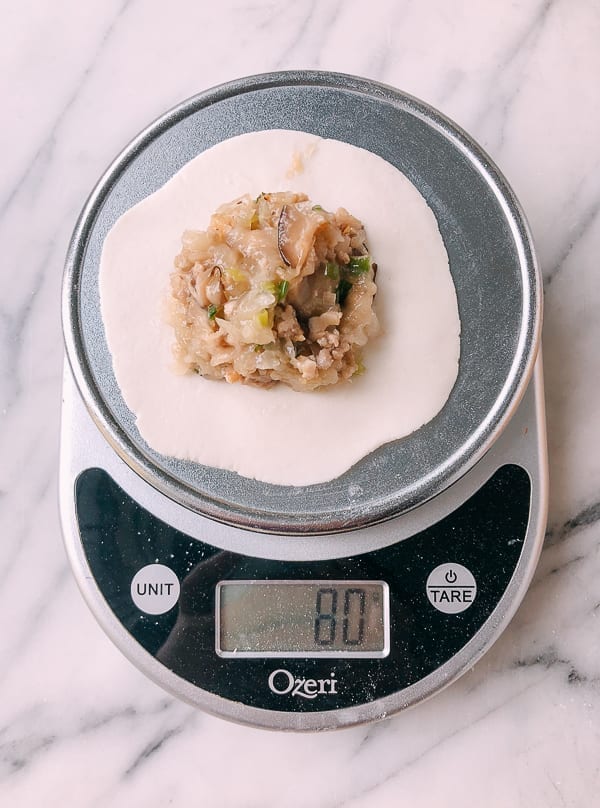
Next, put 35 g of filling in the middle of the dough disc.
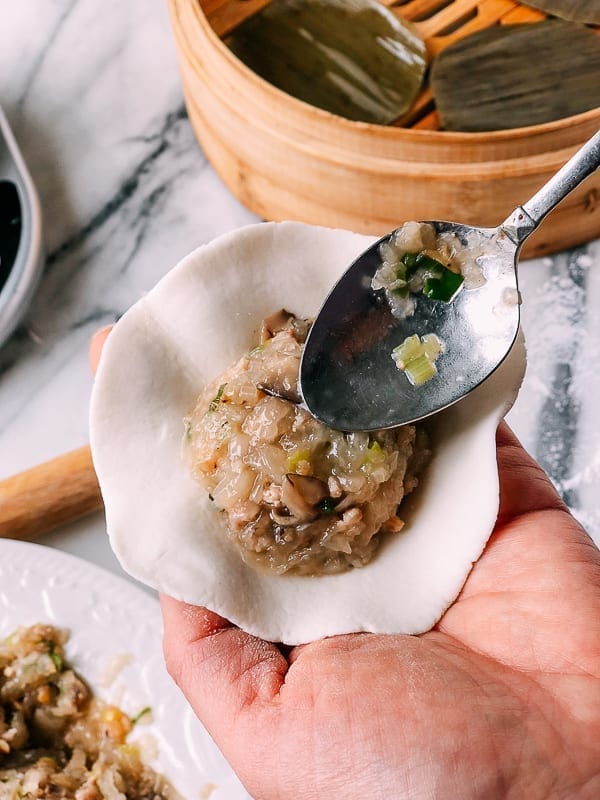
Use a spoon to press the filling together into ball so there are no air pockets in the filling.
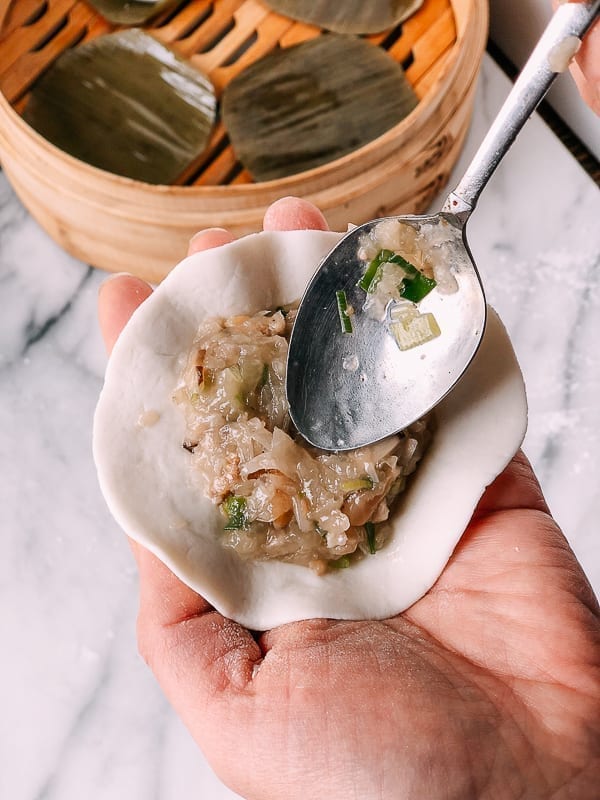
Here, you can again use your kitchen scale to measure how much filling you are using for each cha guo rice cake in order to achieve a uniform size.
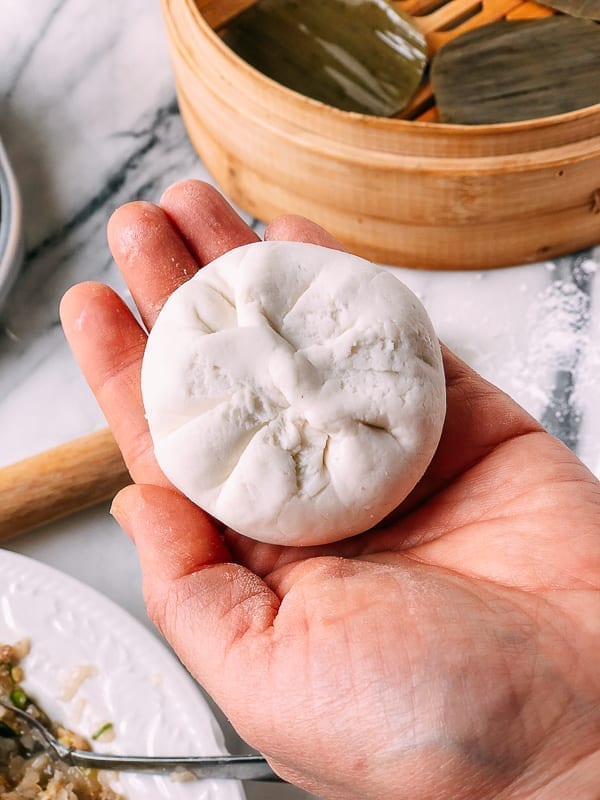
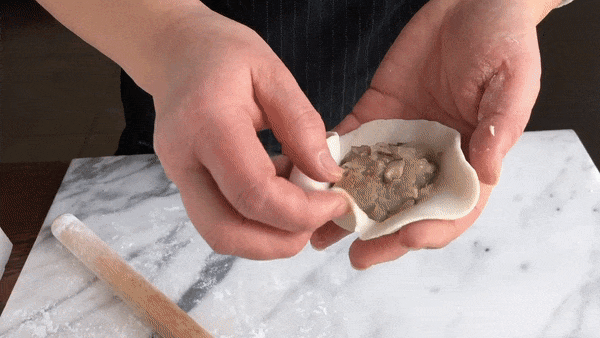
Next, pinch the dough around the edges of the disc until the opening is closed.

The side of the cha guo tea cake you just closed will be the bottom, so no need to worry if the seam is not smooth. Just make sure it is closed and does not leak.
We’ve grown quite fond of gifs at The Woks of Life lately, so here’s another one to demonstrate (we sped it up a bit!):
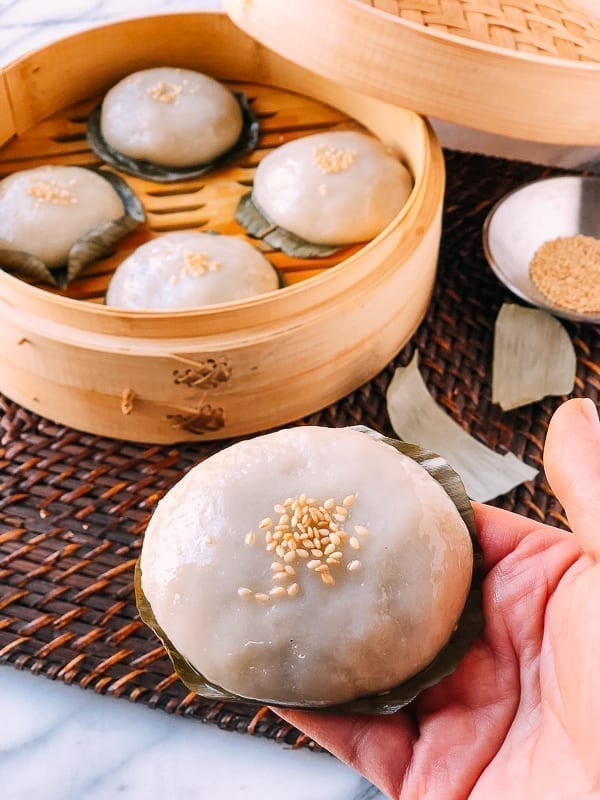
Next, brush your reserved “cooked” vegetable oil on one of your cut zong leaves…
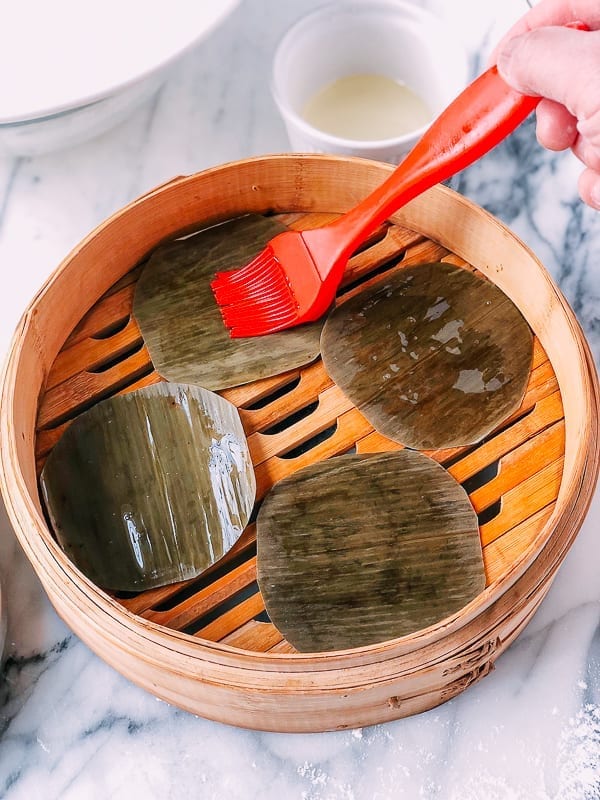
And also on the bottom of the cha guo, and place the cha guo onto the leaf. Gently press until it is flattened slightly.
Place the cha guo in a bamboo steamer or metal steamer, ensuring that there is at least an inch of space between each one. You should be able to fit 4 to 5 cha guo rice cakes on one level. Stack your bamboo steamer levels to steam more tea cakes in one batch. See our post on how to set up a steamer if you’re not familiar with steaming foods in Chinese cooking.
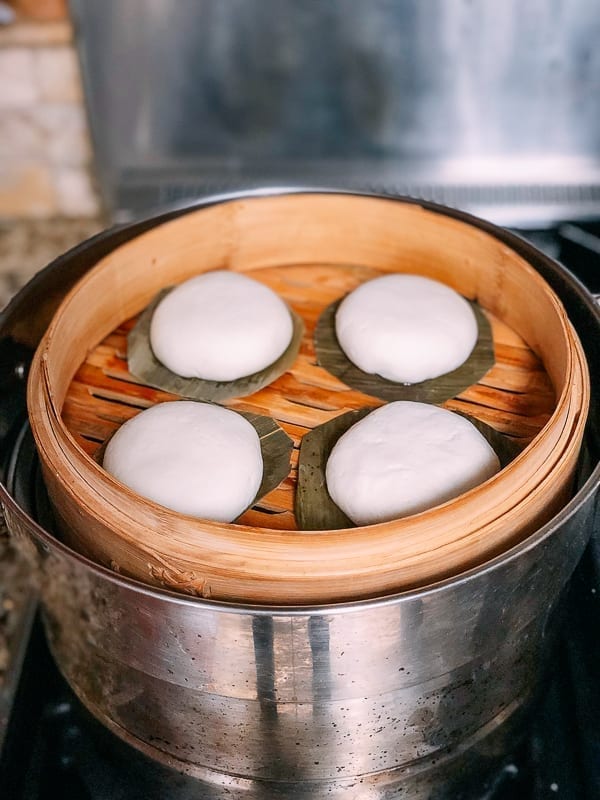
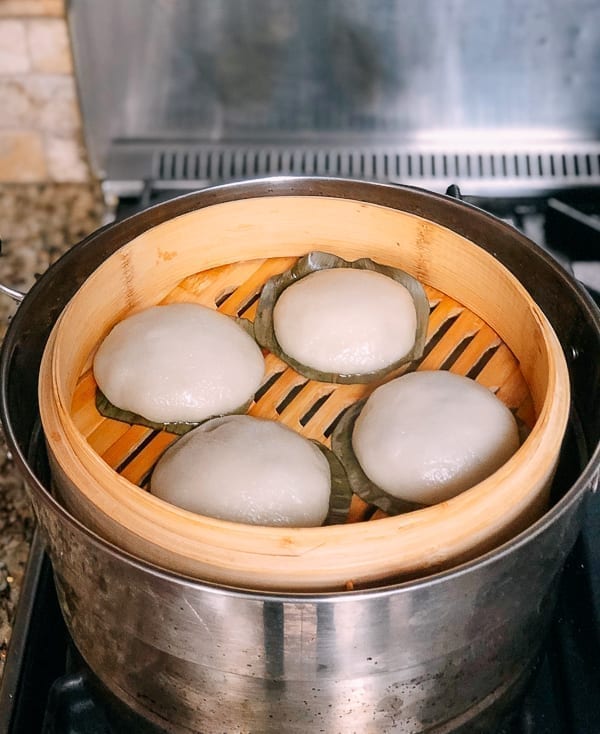
Steam your cha guo rice tea cakes in batches for 10 minutes each.
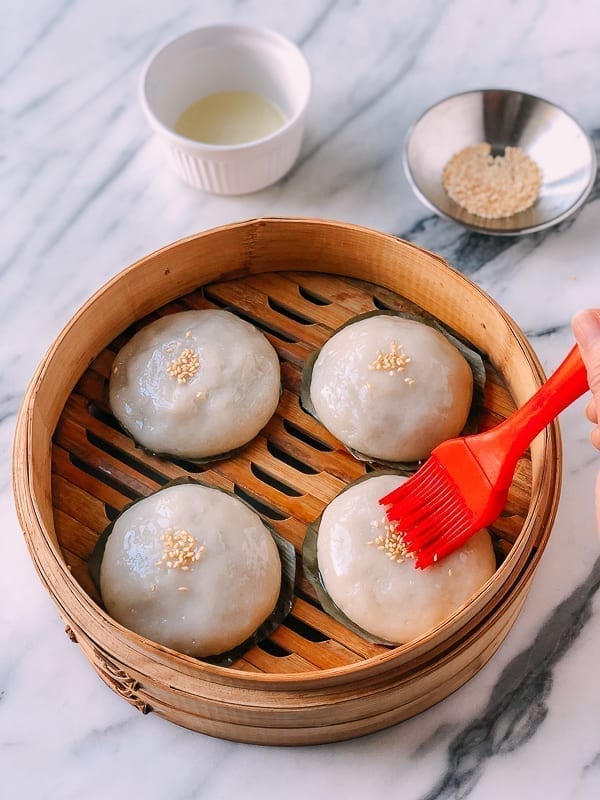
Once done, sprinkle a pinch of toasted sesame seeds on top of each rice cake and gently press them in place. Use a basting brush to lightly brush some of the cooked oil you reserved earlier over each cha guo to prevent them from drying out.
Remove the cha guo to a plate and serve them warm anytime! You can also let them cool completely and freeze them on a plate, placing a layer of plastic or parchment paper between each layer. Keep them in an airtight freezer bag for up to 1 month.
Enjoy these Hakka Cha Guo rice tea cakes and a have a healthy and prosperous Lunar New Year, everyone!
Looking for more authentic recipes? Subscribe to our email list and be sure to follow us on Pinterest, Facebook, Instagram, and Youtube!
Recipe

Cantonese Cha Guo (Savory Rice Cakes)
Ingredients
- 6 zong (bamboo leaves; can substitute parchment paper, cut into 24 4-inch squares)
- 5 dried shiitake mushrooms (about 15g)
- 1 ounce dried shrimp (25 g)
- 5 tablespoons vegetable oil (75 ml, divided)
- 4 ounces ground pork (115 g)
- 2 teaspoons Shaoxing wine (10 ml)
- 24 ounces daikon radish (680 g, coarsely grated)
- 2 scallions (finely chopped)
- 1/2 teaspoon sesame oil
- 2 tablespoons oyster sauce
- 2 1/4 teaspoons salt (divided)
- ½ teaspoon sugar (2 g)
- 1/8 teaspoon white pepper (or to taste)
- 2 teaspoons cornstarch
- 1/4 cup mushroom soaking liquid
- 5 cups glutinous rice flour (600 g, plus more for rolling the dough)
- 1 cup all purpose flour (125 g)
- 1/3 cup tapioca starch (35 g)
- 2 cups boiling water (470 ml)
- toasted sesame seeds (to garnish)
Instructions
- Prepare the zong leaves by soaking them overnight, rinsing them, and cutting each of the six leaves into four 3- to 4-inch squares. If you can’t find these bamboo leaves, then you can use parchment paper as a substitute.
- Soak your dried shiitake mushrooms in a bowl of hot water and place a small plate on top to ensure they are fully submerged for 30 minutes. Cut the stems off the mushrooms and discard them. Return the mushrooms to the water if they still seem dry inside, since thicker mushrooms will take longer to rehydrate. Finely chop the mushrooms and set aside, reserving the water you used to soak them.
- Soak your dried shrimp in hot water for 30 minutes. Pour the shrimp out into a strainer and give them a quick rinse before chopping them.
- Heat 5 tablespoons (75 ml) vegetable oil in a frying pan or wok on medium low heat. Scoop out about 2 tablespoons of the heated oil and set aside for brushing the cha guo after they come out of the steamer.
- Add the dried shrimp to the oil and stir-fry until fragrant, about 30 seconds. Next, add the ground pork and stir-fry for another 30 seconds, or until it is opaque. Stir in the chopped shiitake mushrooms and the Shaoxing wine.
- Next, add the grated daikon radish, chopped scallions, sesame oil, oyster sauce, 1 1/4 teaspoons salt, sugar, and white pepper. Cook on medium low heat until simmering and continue to simmer for another 3 to 4 minutes, or until the daikon radish is just tender.
- Combine 2 teaspoons cornstarch with 1/4 cup of the reserved mushroom soaking liquid, being careful to avoid any dirt or sediment that may have settled on the bottom of the bowl. Add to the wok, and continue to cook and stir until all standing liquid has evaporated, about 2 minutes. Set aside and let cool completely.
- In a large mixing bowl, combine the glutinous rice flour, all purpose flour, tapioca starch, and the remaining 1 teaspoon salt. Gradually stir 2 cups of boiling water into the dry mixture and continue mixing with a rubber spatula or wooden spoon until a dough begins to form. Once the mixture is cool enough to touch, knead the dough into a smooth ball. Add extra glutinous rice flour 1 tablespoon at a time if the dough is too sticky to knead. Once smooth, cover the dough in the bowl with an overturned plate, and let it rest for 20 minutes.
- NOTE: Don’t be thrown off by the amount of dough in the photographs. I made half a batch of dough in these photos, because I decided to freeze the other half of the filling to save for Chinese New Year, when I’ll be making another half batch of fresh dough!
- Divide the dough into 24 equal pieces about 45 g each, and keep them covered with a clean, damp kitchen towel to keep them from drying out while assembling the cha guo. I recommend using a digital scale to keep the cha guo rice cakes uniform in size.
- Press each small ball of dough to form a flat disc. Use a rolling pin to roll out the edges of the disc until it is about 3 ½ to 4 inches in diameter. It’s important to make the edges of the disc slightly thinner than the middle, or you will have too much dough on one side after you pinch and close the edges.
- Next, put 35 g of filling in the middle of the dough disc. Use a spoon to press the filling together into ball so there are no air pockets in the filling. Here, you can again use your kitchen scale to measure how much filling you are using for each cha guo rice cake in order to achieve a uniform size.
- Next, pinch the dough around the edges of the disc until the opening is closed. The side of the cha guo tea cake you just closed will be the bottom, so no need to worry if the seam is not smooth. Just make sure it is closed and does not leak.
- Next, brush your reserved “cooked” vegetable oil on one of your cut zong leaves and also on the bottom of the cha guo, and place the cha guo onto the leaf. Gently press until it is flattened slightly.
- Place the cha guo in a bamboo steamer or metal steamer, ensuring that there is at least an inch of space between each one. You should be able to fit 4 to 5 cha guo rice cakes on one level. Stack your bamboo steamer levels to steam more tea cakes in one batch. Steam your cha guo rice tea cakes in batches for 10 minutes each.
- Once done, sprinkle a pinch of toasted sesame seeds on top of each rice cake and gently press them in place. Use a basting brush to lightly brush some of the cooked oil you reserved earlier over each cha guo to prevent them from drying out.
- Remove the cha guo to a plate and serve them warm anytime! You can also let them cool completely and freeze them on a plate, placing a layer of plastic or parchment paper between each layer. Keep them in an airtight freezer bag for up to 1 month.


